
Every box you pack needs five things on the label: the destination room (using its full name at the new house), a 3–5 item contents summary, a priority level (OPEN FIRST / PRIORITY / STANDARD), a fragility or weight flag if applicable, and a unique box ID such as “Kitchen #4.” Write that information on at least two adjacent sides in the upper third of each side, because tops disappear the moment boxes start stacking. For fragile or essentials boxes, add the label to the top as well.
Here is what a complete label contains at a glance:
- Destination room: Full name only — “Master Bedroom,” never “MBR”
- Contents: 3–5 key items, not a full inventory (“plates, bowls, mugs”)
- Priority: OPEN FIRST / PRIORITY / STANDARD
- Flags: FRAGILE (red) or HEAVY where applicable
- Box ID: Room name + sequential number (“Living Room #3”)
Move Craft Moving Solutions, the Federal Motor Carrier Safety Administration (FMCSA), and the American Moving & Storage Association (AMSA) all treat consistent labeling as a baseline operational standard, not an optional nicety.
Table of Contents
- Set up your labeling system before you pack the first box
- Why consistent labeling saves time and prevents real losses
- When should you write labels in your packing workflow?
- What exactly should you write on every moving box label?
- Which label system fits your move size?
- What labeling supplies actually hold up in transit?
- Where to place labels so movers can always see them
- How to hand off your label system to professional movers
- Special labeling for electronics, artwork, and hazardous materials
- How labels and photos protect you if something goes wrong
- Ready-to-use label templates you can copy right now
- Key Takeaways
- The labeling mistake that costs the most time on moving day
- Move Craft takes labeling and inventory off your plate
- Useful sources and further reading
Set up your labeling system before you pack the first box
Getting this right takes about 15 minutes before you touch a single item.
- Choose your room names. Write a list of every room in the new house using its full, consistent name. “Master Bedroom” on every label, every time.
- Assign a color per room. Pick one color of tape or dot sticker for each destination. Blue for the kitchen, green for the master bedroom, and so on. You will match these to color-coded door signs at the new address.
- Choose your tools. At minimum: a thick permanent black marker, colored packing tape or dot stickers, and wide clear tape to seal labels. For larger moves, add a label printer or pre-printed label sheets.
- Set up your master inventory. A simple spreadsheet or a moving app works. Columns: Box ID, Room, Brief Contents, Pack Date, Status.
- Pre-number your boxes per room. Write the room name and number on the box before you fill it.
- Designate your OPEN FIRST box. One box per household member for night-one essentials. Load it last; it comes off the truck first.
Pro Tip: Pre-write the room name and box number on empty boxes the night before you pack a room. Add the contents line only after you seal the box — that way the label is always accurate.

Why consistent labeling saves time and prevents real losses
Vague labels do not just slow you down — they cost you. When a box says only “kitchen,” movers have no way to prioritize it, and you end up opening four boxes to find a coffee maker on night one.
A consistent system built around room names, box IDs, and priority flags gives movers and helpers a clear sorting map without constant direction from you. Color-coding every side of each box means a helper can place boxes correctly at a glance, even in a rushed unloading environment. That matters most when a crew is moving fast and you are managing a dozen other things.
Labels are also your primary coordination tool with professional movers. A carrier who receives a shared master inventory and a color-key before loading can sequence the truck correctly, stack fragile boxes safely, and confirm box counts by room at delivery. Movecraftmoving’s coordination model is built around exactly this handoff: sharing the inventory and color-key with vetted carriers before the truck is loaded.
When should you write labels in your packing workflow?
Label as you go — not after you have sealed a stack of boxes. Waiting until the end produces vague labels because you no longer remember exactly what went in each box.
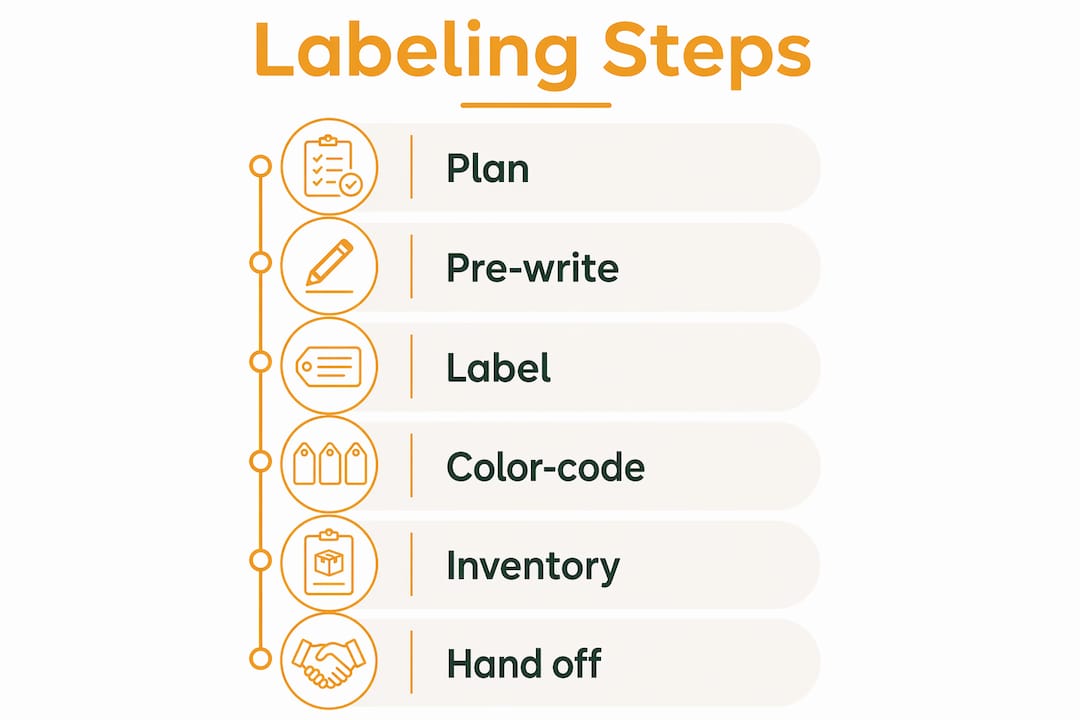
- Set up your label system and master inventory (see the checklist above).
- Pack one room completely before moving to the next.
- Seal each box and label it immediately, including the contents line.
- Record the box in your master inventory before setting it aside.
- Repeat room by room until the house is packed.
Pro Tip: If you are packing over several days, date each box. “Kitchen #4 — packed March 14” makes it easy to flag boxes packed in a rush at the end, which tend to have the vaguest contents.
What exactly should you write on every moving box label?
Required fields
| Field | What to write | Why it matters |
|---|---|---|
| Destination room | Full room name at new address | Movers place boxes without asking |
| Contents | 3–5 key items | Find anything without opening the box |
| Priority | OPEN FIRST / PRIORITY / STANDARD | Controls unloading sequence |
| Fragility/weight | FRAGILE (red) or HEAVY | Prevents mishandling |
| Box ID | Room name + number (e.g., Kitchen #4) | Links to master inventory entry |
Optional fields worth adding
- Owner name for multi-person households or shared moves
- Storage vs. unpack instruction (“STORAGE — DO NOT UNPACK”) for boxes going to a unit rather than a room — useful for East Coast storage moves
- Date packed for multi-day packing sessions
- Short value note on high-value boxes for insurance reference
Your master inventory maps every box ID to its room, brief contents, pack date, and status. That single document is what lets you detect a missing box at delivery instead of three days later.
Which label system fits your move size?
Three formats cover almost every residential move.
| System | Fields included | Best for |
|---|---|---|
| Minimal | Room name + brief contents | Studio or 1-bedroom, self-move |
| Standard | Room + Box ID + 3 key contents + priority flag | 2–4 bedroom, hired movers |
| Advanced | Standard + QR code or photo link + digital inventory | 50+ boxes, long-distance, high-value |
Color-coding in practice: Apply one color of tape to every side of each box for its destination room. Post a matching color card on each door at the new house. Movers sort by color without reading a single word.
For moves with 50 or more boxes, QR-code labels linked to a digital inventory let you scan a box to see its full contents, photos, and notes. That is the threshold where a spreadsheet alone starts to slow you down. Movecraftmoving recommends the Advanced system for all long-distance moves coordinated through a relocation strategist.
Pro Tip: Print your labels rather than handwriting them for moves above 30 boxes. A Brother QL-800 or similar label printer produces legible, consistent labels in seconds and eliminates the “I can’t read my own writing” problem on moving day.
What labeling supplies actually hold up in transit?
- Permanent black markers: Sharpie King Size or equivalent. Fine-tip markers bleed on cardboard and become unreadable.
- Colored tape or dot stickers: 2-inch colored packing tape per room color, or 2-inch dot stickers for a lighter touch.
- Wide clear tape: Seal every label with a strip of clear packing tape to prevent smudging in humidity or rain.
- Pre-printed label sheets or a label printer: Worthwhile for 20+ boxes. Avery 5163 (2"×4") sheets work with any standard printer.
- Waterproof sticker sheets: For boxes going into storage or shipping containers.
One practical note on recycled boxes: cover all old markings completely with white labels or solid white tape before writing new ones. A box that still says “Amazon” or has a previous room name visible will confuse movers and helpers, especially in a fast-moving unload.
Where to place labels so movers can always see them
Label at least two adjacent sides in the upper third of each side. When boxes are stacked two or three high, the lower half of every side is blocked. The upper third stays visible.
- Fragile boxes: Write FRAGILE in large red letters on all four sides and the top. Add upward-pointing arrows so handlers know orientation.
- Heavy boxes: Mark HEAVY on at least two sides. Movers need to see it before they lift, not after.
- Essentials/OPEN FIRST boxes: Label all four sides and the top. These boxes need to be identifiable from any angle in a loaded truck.
For reused boxes, check that old labels or markings are fully covered before adding new ones. A box with two conflicting room names will end up in the wrong room.
How to hand off your label system to professional movers
A well-labeled set of boxes only works if the movers know the system before they start loading.
- Share the master inventory and color-key with your Move Craft coordinator or lead mover at least 24 hours before loading. A long-distance moving inventory checklist gives you a ready-made template for this.
- Brief the crew on your three priority levels and the color-code map before the first box moves.
- Load OPEN FIRST boxes last onto the truck so they come off first at the destination.
- Post room color cards on every door at the new house before the truck arrives.
- Confirm box counts by room with the lead mover before they leave. If Kitchen shows 12 boxes on your inventory and only 10 are in the room, you know immediately.
Pro Tip: Give the lead mover a printed one-page color-key and a copy of your room list. It takes 30 seconds to hand over and eliminates the most common unloading errors.
Special labeling for electronics, artwork, and hazardous materials
Electronics: List the device name and serial number on the label for high-value items. Pack chargers and small parts in labeled zip bags, tape them to the outside of the box, and photograph the setup before sealing.
Artwork and framed items: Add “THIS SIDE UP” arrows, FRAGILE on all sides, and note if tempered glass is present. For high-value pieces, consider professional crating rather than standard boxes.
Wardrobes and closet systems: Use wardrobe boxes labeled with owner name and destination room. For hardware and small parts, use numbered envelopes taped inside the box lid and photograph them before closing.
Hazardous materials: The FMCSA prohibits packing flammables, compressed gases, and regulated hazardous materials in household moving boxes. These require hazmat disposal services or specialized carriers. Do not label them as standard household goods — list them separately and confirm handling with your carrier before move day.
How labels and photos protect you if something goes wrong
A box ID tied to a master inventory entry is your fastest path through an insurance claim. Before sealing any high-value box, photograph the contents, note the condition, and record serial numbers for electronics. Link those photos to the box ID in your inventory.
- A master inventory with box numbers lets you confirm delivery counts by room and flag missing boxes at the door, not days later.
- Pre-move condition photos paired with box IDs give claims adjusters exactly what they need without back-and-forth.
- Keep your OPEN FIRST box photo and inventory entry on your phone. If that box is missing or damaged on arrival, you have documentation in hand immediately.
Pro Tip: Screenshot your master inventory to your phone before loading day. If your laptop is in a box somewhere on the truck, you still have the full box list accessible.
Ready-to-use label templates you can copy right now
Sample label formats
| Format | Label text example |
|---|---|
| Minimal | Kitchen / Pots, lids, colander |
| Standard | Kitchen #4 / Pots, lids, colander / PRIORITY |
| Advanced | Kitchen #4 / Pots, lids, colander / PRIORITY / [QR code] |
Where to place each field on the box:
- Line 1 (largest text): Room name and box ID
- Line 2: 3–5 key contents
- Line 3: Priority level
- Line 4 (if applicable): FRAGILE or HEAVY in red or bold
For the Advanced system, generate a QR code using a free tool like QR Code Generator and link it to your inventory row for that box. Print the QR code on the label or tape a printed code to the box. This workflow pays off on moves with 50+ boxes or any long-distance packing service where boxes may sit in storage before delivery.
Keep your master spreadsheet columns in the same order as your label fields: Box ID, Room, Contents, Priority, Pack Date, Status. That alignment makes cross-referencing fast on unloading day.
Key Takeaways
Consistent box labeling — two sides, a unique ID, and a shared master inventory — cuts unloading time, prevents misplacement, and gives you a clear paper trail if anything is damaged or missing.
| Point | Details |
|---|---|
| Label two adjacent sides | Place labels in the upper third so they stay visible when boxes are stacked. |
| Use a unique box ID | Room name plus a sequential number (e.g., Kitchen #4) links each box to your master inventory. |
| Set OPEN FIRST boxes | Mark essentials boxes on all sides and load them last so they come off the truck first. |
| Share inventory with movers | Give your color-key and master inventory to your carrier or coordinator before loading begins. |
| Movecraftmoving coordination | Movecraftmoving enforces labeling and handling standards with vetted carriers and syncs your inventory for a faster, verifiable unload. |
The labeling mistake that costs the most time on moving day
The conventional wisdom on moving labels focuses on what to write. The real problem is when people write it and whether they share it.
Labeling after packing is the single most common mistake, and it produces the vaguest labels. By the time you have sealed 40 boxes, you genuinely cannot remember whether the “kitchen” box has the good knives or the junk drawer. Writing the contents line as you seal each box takes ten extra seconds and saves 20 minutes of digging at the other end.
The second mistake is treating the label as a private note to yourself. A label system that only you understand is not a system — it is a liability on moving day. Movers who do not know your color-key will stack boxes by size, not by room. Helpers who cannot read your shorthand will ask you constantly. The fix is a one-page color-key and room list handed to the lead mover before the first box moves.
Movecraftmoving coordinators run a short pre-load check on every move: confirm the color-key is posted, verify OPEN FIRST boxes are loaded last, and do a room-by-room box count against the master inventory. That three-minute check catches the errors that turn into hour-long searches at the destination.
Move Craft takes labeling and inventory off your plate
Packing and labeling a full household correctly takes planning most people do not have time for in the middle of a move. Movecraftmoving handles the coordination layer: enforcing labeling and handling standards with every vetted carrier, syncing your master inventory before loading, and confirming box counts at delivery so nothing disappears quietly.

The concrete difference from managing it yourself: your movers arrive knowing the color-key, the OPEN FIRST sequence, and the fragile-stack rules before a single box moves. You get a faster unload, fewer misplaced boxes, and a verified delivery record that supports any insurance claim. For families and businesses planning a full-service relocation, Movecraftmoving coordinates every step from packing oversight to final room placement. Request your move quote at movecraftmoving.com and tell us your move date to get started.
Useful sources and further reading
- How to Label Moving Boxes the Right Way — Placement rules, color-coding, and OPEN FIRST guidance
- How to Label Moving Boxes So You Can Find Anything in 10 Seconds — 3-part label system and QR/digital inventory workflow
- 7 Tips for Labeling Moving Boxes — Fragile labeling, timing, and handling flags
- Why You Should Always Label Your Boxes Before Moving — Master inventory and claims support
- Long-distance moving inventory checklist — Move Craft’s inventory template that matches the box ID workflow in this article
- Residential move walkthrough — Move Craft’s broader pre-move checklist for renters and homeowners
- Best Way to Label Boxes for Moving — Hybrid room/number/color system and common labeling mistakes
Download the printable label templates from the Standard and Advanced formats above, fill in your room names and color assignments, and share the completed color-key with your Move Craft coordinator or lead mover before loading day.
Recommended
- Residential Move Walkthrough: What Every Renter Must Know – Move Craft Moving Solutions LLC
- Why Residential Moves Need Utility Coordination – Move Craft Moving Solutions LLC
- East Coast Storage Solutions During Relocation: 2026 Guide – Move Craft Moving Solutions LLC
- Full-Service Relocation Benefits for Families in 2026 – Move Craft Moving Solutions LLC