
A residential move walkthrough is a formal inspection of a property’s condition conducted at the start and end of a tenancy to document damage, protect security deposits, and establish clear responsibility between tenant and landlord. The industry term for this process is a “move-in/move-out inspection,” though “walkthrough” is the phrase most renters use when searching for guidance. Understanding what is a residential move walkthrough before your relocation date gives you a documented baseline that can save you hundreds of dollars in wrongful deposit deductions. Movecraftmoving works with families every day who skip this step and regret it at move-out.
A move-in/move-out inspection is standard industry practice specifically designed to reduce deposit disputes. The walkthrough is not a maintenance request or a repair order. It is a neutral record of the property’s condition at a specific point in time.
What is a residential move walkthrough and why does it matter?
A residential move walkthrough is your single best tool for protecting your security deposit. Without a documented baseline, a landlord can claim that a pre-existing scratch on the hardwood floor or a cracked tile in the bathroom happened during your tenancy. You have no defense without written records and photos from move-in day.
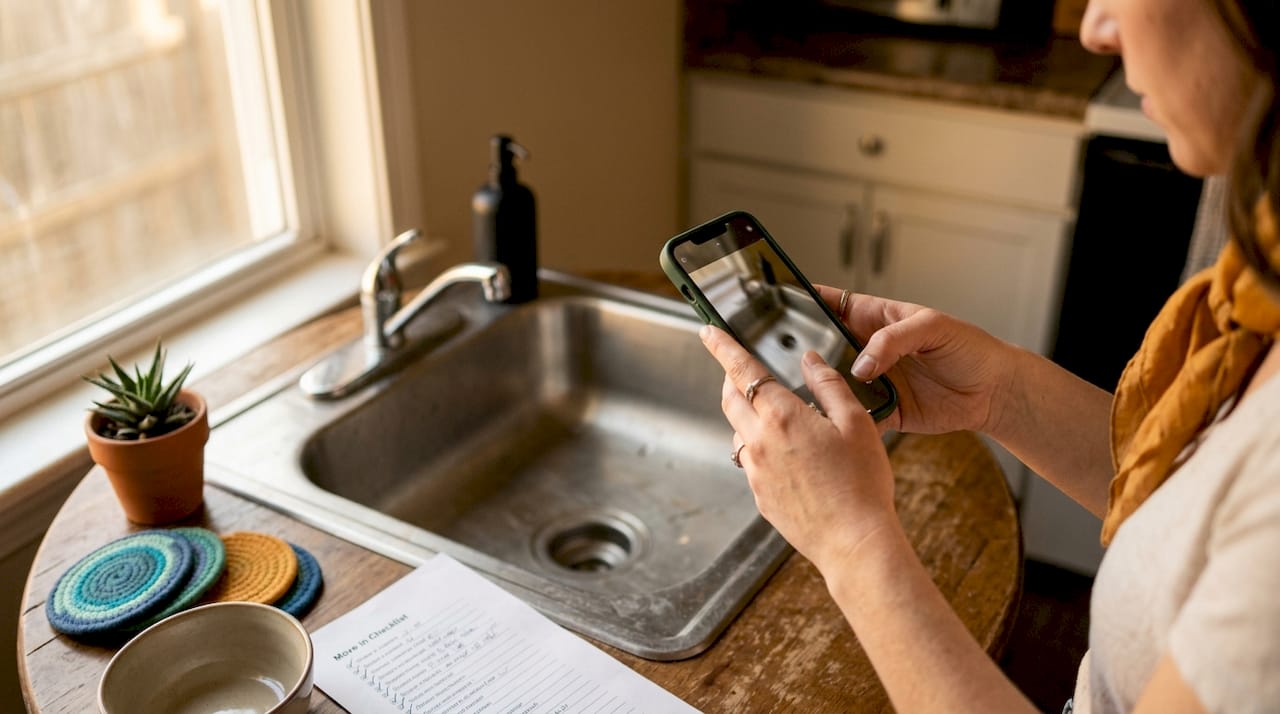
Walkthroughs focus on documenting the “as-is” condition of a property, not on flagging maintenance issues for repair. That distinction matters. Many tenants treat the walkthrough as a chance to request fixes. The real purpose is to create a legal record that protects both parties from future liability.
Move-in/move-out inspections also apply to homeowners, not just renters. If you are buying a home and want to verify that agreed-upon repairs were completed before closing, a pre-closing walkthrough serves the same documentation function. The process is the same: systematic, room-by-room, with written notes and photos.
When and how to schedule your move walkthrough
Timing your walkthrough correctly is as important as doing one at all. Schedule the move-in walkthrough before any furniture or boxes enter the property. An empty space reveals floor stains, wall scuffs, and appliance issues that furniture would otherwise hide. Once your belongings are inside, those details become nearly impossible to document fairly.
For move-out walkthroughs, landlord notice periods typically range 30 to 90 days. Request your walkthrough date in writing as soon as you submit your notice to vacate. Waiting until the final week creates scheduling conflicts and gives you less time to address any issues the landlord identifies.
Follow these steps to schedule your walkthrough without friction:
- Submit your move-out notice in writing and request a walkthrough date in the same message.
- Confirm the date and time via email or text so you have a written record.
- Ask your landlord or property manager to attend in person. A walkthrough without both parties present carries less weight in a dispute.
- Schedule the move-in walkthrough for the day you receive the keys, before your moving truck arrives.
- Allow 30–60 minutes for a thorough inspection of a standard apartment or house.
Pro Tip: If your landlord cannot attend in person, record a timestamped video walkthrough on your phone and send them a copy immediately. This creates a shared record even without their physical presence.
Coordinating the walkthrough with your broader residential moving plan reduces stress significantly. When your moving schedule is organized around the walkthrough, you avoid the common mistake of rushing through the inspection while movers wait outside.
What to inspect during a residential move walkthrough
A thorough walkthrough checklist covers walls, ceilings, floors, appliances, plumbing, HVAC systems, and safety devices. Skipping any category creates gaps in your documentation that a landlord can exploit later. Work through each room systematically rather than scanning broadly.
Key areas to check in every room:
- Walls and ceilings: Look for cracks, stains, holes, and peeling paint. Note the exact location of any damage.
- Floors: Check for scratches, stains, loose tiles, and warped hardwood. Lift area rugs if any are present.
- Windows and doors: Test every lock, latch, and hinge. Note broken seals or cracked glass.
- Electrical outlets: Plug a phone charger into each outlet to confirm it works.
- Plumbing: Run every faucet, flush every toilet, and check under sinks for moisture or staining.
- Appliances: Test the oven, stovetop, dishwasher, refrigerator, and any included washer or dryer.
- HVAC: Turn on heating and cooling to confirm both function. Check that filters are clean.
- Smoke and carbon monoxide detectors: Press the test button on each unit.
Pro Tip: Photograph every item you note on your checklist. Timestamped photos and video are far more effective than written notes alone in a deposit dispute. Name your photo files by room and item for easy reference.
The table below shows the main inspection categories and what to look for in each:
| Inspection Area | What to Check |
|---|---|
| Walls and ceilings | Cracks, holes, stains, paint condition |
| Floors | Scratches, stains, loose or warped sections |
| Plumbing | Water pressure, leaks, drain speed |
| Appliances | Full function test on all included units |
| Safety devices | Smoke detectors, CO detectors, fire extinguisher |
| HVAC | Heating and cooling function, filter condition |
A professional walkthrough typically takes 30–60 minutes for a standard unit. Budget that time into your moving day schedule so you are not rushing.
How do move-in and move-out walkthroughs differ?
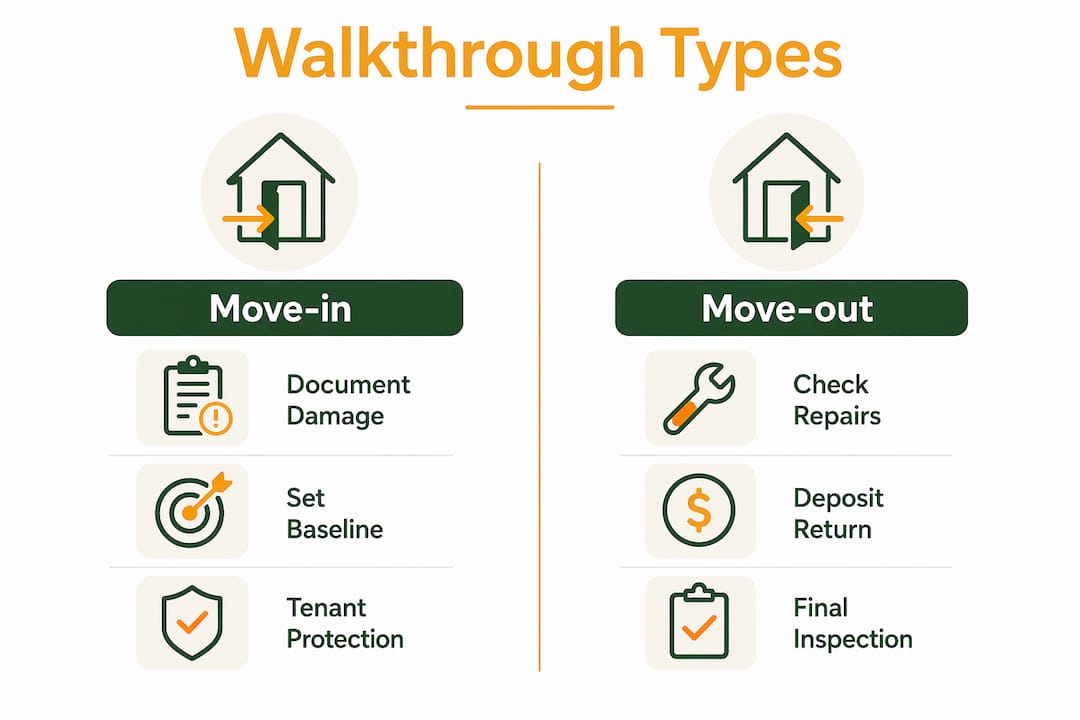
Move-in and move-out walkthroughs serve opposite but equally important purposes. The move-in walkthrough documents damage that already exists before you take possession. The move-out walkthrough checks for new damage that occurred during your tenancy. Both are necessary. Neither replaces the other.
Tenants have only one formal opportunity at move-in to claim pre-existing damage. If you miss a crack in the bathroom tile during the move-in inspection, you may be charged for it at move-out. That is why the move-in walkthrough carries more financial risk for tenants.
| Walkthrough Type | Primary Purpose | Who Benefits Most |
|---|---|---|
| Move-in | Document pre-existing damage | Tenant |
| Move-out | Identify new damage for deposit deductions | Landlord |
| Both combined | Create a neutral, shared record | Both parties equally |
Clear baseline documentation significantly lowers the incidence of deposit disputes at move-out. When both parties sign the same move-in checklist, the move-out conversation starts from a shared set of facts rather than competing memories. That shared record speeds up deposit returns and reduces the need for legal action.
Walkthroughs create a neutral record that helps landlords clarify repair responsibilities and turn over units faster. A landlord who uses walkthroughs consistently spends less time in small claims court and more time managing their property efficiently.
How to prepare effectively for your residential move walkthrough
Preparation before the walkthrough determines how useful the documentation will be. An unprepared walkthrough produces vague notes that neither party can rely on later.
Conduct the walkthrough on an empty property before unpacking a single box. Furniture and boxes block floors, walls, and outlets. Damage hidden by your belongings at move-in becomes your liability at move-out.
Steps to prepare for a thorough walkthrough:
- Print or download a room-by-room checklist before you arrive. Generic checklists work, but a checklist tailored to the property type (apartment, single-family home, condo) is more reliable.
- Bring your smartphone fully charged. You will take more photos than you expect.
- Wear comfortable shoes. You will crouch, kneel, and move through every room methodically.
- Bring a notepad or use a notes app to record specific details that photos alone cannot capture, such as odors or sounds from HVAC units.
- Ask every question you have during the walkthrough, not after. Once you leave and sign the checklist, your opportunity to add items is limited.
Common oversights that cost tenants money: skipping the interior of kitchen cabinets, ignoring the garage or storage areas, and failing to test every light switch. These areas seem minor but appear on move-out checklists regularly. A solid residential moving plan accounts for the walkthrough as a scheduled task, not an afterthought.
Tenants who understand that walkthrough documentation protects them from financial liability participate more thoroughly and leave with stronger records. Treat the walkthrough as seriously as signing the lease itself.
Key Takeaways
A residential move walkthrough is the single most effective tool for protecting your security deposit and preventing disputes with your landlord.
| Point | Details |
|---|---|
| Define the purpose | A walkthrough documents property condition, not maintenance needs. |
| Time it correctly | Complete the move-in walkthrough before furniture enters the property. |
| Cover every area | Inspect walls, floors, appliances, plumbing, HVAC, and safety devices systematically. |
| Use photo evidence | Timestamped photos and video outperform written notes in deposit disputes. |
| Know the difference | Move-in protects tenants; move-out determines deposit deductions. |
Why I think most renters underestimate the walkthrough
Most renters treat the move-in walkthrough as a formality. They scan the apartment quickly, sign the checklist, and focus on getting their boxes inside. That approach costs them money at move-out, and I have seen it happen repeatedly.
The walkthrough is the only moment in a tenancy where you hold all the leverage. Before you move in, the property’s condition is an open question. After you sign that checklist, the record is set. Every item you fail to document becomes your potential liability. A small crack in the bathroom tile that costs $40 to fix can turn into a $200 deduction if it is not on the move-in record.
The most common mistake I see is treating the walkthrough as adversarial. Tenants worry that pointing out damage will upset the landlord. Landlords worry that tenants are building a case against them. Both reactions miss the point. A walkthrough done well is a collaborative record that protects everyone. When both parties sign the same document, the move-out conversation is factual, not emotional.
My honest advice: spend the full 30–60 minutes, photograph everything, and ask your landlord to co-sign the checklist on the spot. That one hour of effort can protect your entire deposit.
— Info
How Movecraftmoving supports your move from day one
Movecraftmoving coordinates every stage of your home relocation process, including the documentation steps that most movers overlook.

When you work with Movecraftmoving, you get a residential moving plan that accounts for walkthrough scheduling, moving day timing, and carrier coordination. Our relocation strategists help you build a moving checklist that fits your specific property type and lease timeline. We connect you with vetted carriers who respect your schedule and your belongings. Visit Movecraftmoving to see how professional moving support turns a stressful process into a predictable one.
FAQ
What is a move-in walkthrough?
A move-in walkthrough is a room-by-room inspection of a rental property conducted before the tenant moves in belongings, documenting pre-existing damage to protect the tenant’s security deposit.
How long does a residential move walkthrough take?
A thorough walkthrough typically takes 30–60 minutes for a standard apartment or house, covering all rooms, appliances, utilities, and safety devices.
Do I need photos during a move walkthrough?
Timestamped photos and video are far more effective than written notes alone in a deposit dispute, making them a necessary part of any walkthrough documentation.
Can I do a walkthrough without my landlord present?
You can conduct a solo walkthrough, but having your landlord co-sign the checklist in person gives the document much stronger legal standing. If they cannot attend, send them a timestamped video immediately after.
When should I schedule my move-out walkthrough?
Request your move-out walkthrough date at the same time you submit your notice to vacate, since landlord notice periods typically range 30 to 90 days and scheduling early prevents conflicts.