
A long distance moving inventory checklist is a room-by-room record of every item you plan to move, including box numbers, brief content descriptions, and condition notes. Without one, you risk lost belongings, disputed insurance claims, and surprise charges that can push your total moving cost well above your original budget. The industry term for this document is a “household goods inventory,” and professional movers use it to price, load, and deliver your shipment. Building your own personal version gives you an independent verification tool that no carrier can override. This guide walks you through exactly how to build, use, and maintain one for a long distance relocation.
What does a long distance moving inventory checklist include?
A complete moving inventory covers every box and item leaving your home, organized by room and assigned a unique number. Each entry needs at minimum a box number, a brief content description of 3–5 words, and a condition note. 3–5 word descriptions per box, paired with a photo, strike the right balance between detail and efficiency. Going more granular than that creates a document so cumbersome you will stop updating it by week two.
High-value items deserve their own section. For electronics, appliances, and jewelry, record the make, model, and serial number. Document high-value items with serial numbers and consider transporting them personally rather than loading them onto the truck. This single habit eliminates the most contentious insurance disputes.

The checklist also needs a condition column. A scratch on a dresser that existed before the move should be noted and photographed before packing. That documentation is what separates a successful insurance claim from a denied one.
When should you start your moving inventory?
Start your inventory 8–12 weeks before your move date. Proactive planning at 8–12 weeks out reduces the risk of unplanned expenses exceeding 20% of your budget. That is not a small margin. On a $5,000 move, 20% is $1,000 in costs you did not see coming.
The first step is a room-by-room walkthrough with nothing in hand except your phone. Walk through every room and take a video. You are not packing yet. You are assessing volume, identifying items you want to sell or donate, and getting a realistic picture of what you own. This walkthrough typically reveals 15–20% more items than people expect.
Use that walkthrough to build your initial item list. You can use a spreadsheet, a dedicated moving app, or even a notes app. The format matters less than the habit of updating it consistently.
- Weeks 8–12: Complete walkthrough, build master item list, begin decluttering
- Weeks 5–7: Assign box numbers, photograph high-value items, start packing non-essentials
- Weeks 2–4: Pack remaining rooms, update inventory as each box is sealed
- Moving week: Final walkthrough, share inventory with your moving team
Pro Tip: Declutter before you inventory, not after. Every item you donate or sell is one less entry to track, one less box to move, and a direct reduction in your weight-based or volume-based moving quote.
How do you build an efficient inventory system?
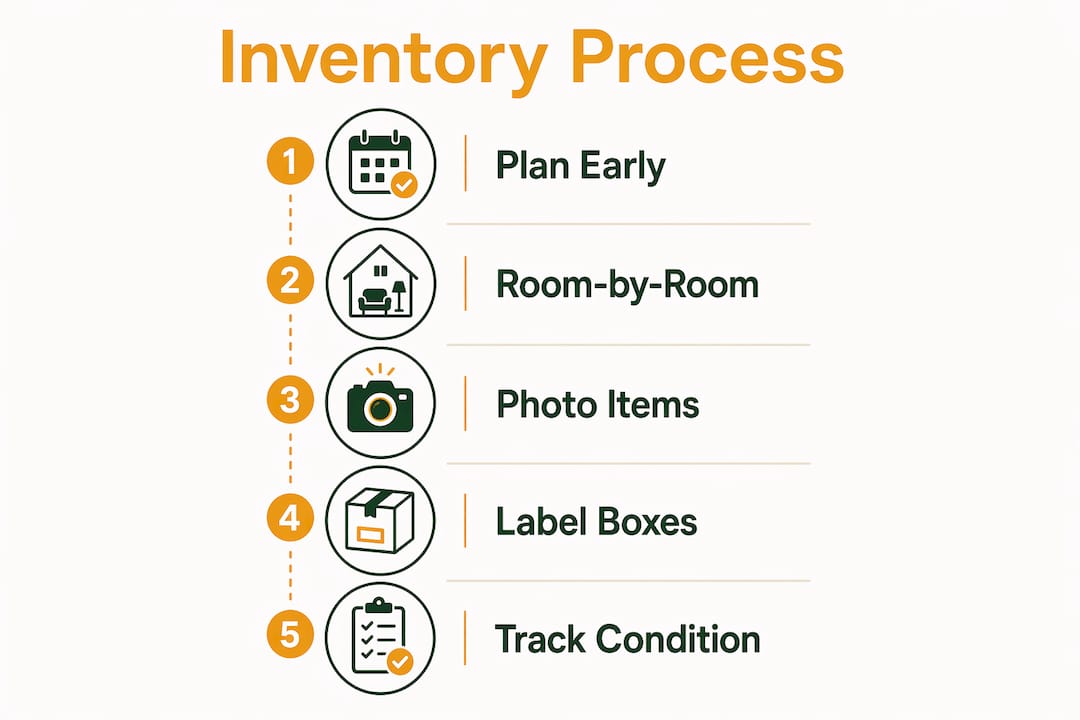
The most effective system combines a digital app with a physical labeling method. Digital inventory apps allow photo attachments, searchability, and easy sharing with your movers and family members. Paper lists get wet, torn, or lost in the chaos of moving day. A digital backup stored in cloud storage costs nothing and survives every scenario.
Here is the step-by-step process that works for most long distance moves:
- Create a master spreadsheet or app entry with columns for box number, room, contents description, condition, and photo link.
- Number every box before you start packing. Use a marker on at least two sides of each box.
- Pack one room at a time and log each box immediately after sealing it.
- Photograph the contents of each box before closing it. A 10-second photo saves hours of searching later.
- Note condition issues for any item with existing damage. Write “pre-existing scratch, left side” rather than just “scratched.”
- Add a separate section for items not in boxes: furniture, appliances, bikes, and anything loaded loose onto the truck.
- Share the final list with your moving coordinator and keep a copy accessible on your phone throughout the move.
Pro Tip: Apps with QR code labeling let you scan a box and pull up its full contents instantly. QR code labeling dramatically speeds up both loading and unpacking, especially when boxes end up in the wrong room.
Avoid the two most common mistakes at this stage. First, do not skip small items. A box of kitchen gadgets worth $300 total is worth documenting. Second, do not create separate lists for each room without a master index. You need one searchable document, not six separate files.
How do you use your inventory on moving day and during unpacking?
Your inventory becomes a live verification tool the moment the first box leaves your home. Industry standards recommend starting packing about six weeks before your move, beginning with non-essential items. By moving day, your inventory should already be complete and every box sealed and numbered.
On loading day, cross-check each box number as it goes onto the truck. Your mover will create their own official inventory, called a bill of lading or a carrier inventory. Compare your list against theirs before signing anything. Discrepancies at this stage are far easier to resolve than discrepancies at delivery.
- Before loading: Confirm every box number appears on your master list
- During loading: Watch for items loaded without a number and add them immediately
- At delivery: Check off each box as it comes off the truck
- After delivery: Do a full count before the movers leave
A personal inventory list is your primary verification tool for identifying missing or damaged items quickly. Professional movers create their own records, but those records serve the carrier’s interests first. Your list serves yours.
Pro Tip: Pack an essentials box containing medications, chargers, a change of clothes, and important documents. Keep its inventory separate and transport it in your personal vehicle. This box should never go on the truck.
For insurance purposes, photograph item conditions before packing and again at delivery if you notice damage. The before-and-after comparison is the foundation of any successful damage claim. Without it, carriers can argue that damage was pre-existing.
What are the most common inventory mistakes to avoid?
Most inventory failures come from one of five predictable errors. Recognizing them before you start saves significant time and money.
- Starting too late. An inventory built in the final two weeks before a move is rushed, incomplete, and rarely updated. The 8–12 week window exists because you need time to declutter, photograph, and refine the list before packing begins.
- Over-detailing early boxes, then giving up. Writing a full paragraph for the first ten boxes and then abandoning the system by box 30 is worse than a simple system applied consistently. Consistent inventory updates throughout the entire process are what make the document useful at delivery.
- Skipping photos. Written descriptions alone are insufficient for insurance claims. A photo of a cracked TV stand corner is evidence. “Cracked corner” written in a spreadsheet is an assertion.
- No digital backup. A paper list left on the kitchen counter on moving day is a common disaster. Store your inventory in Google Sheets, Apple Notes, or any cloud-based tool that syncs automatically.
- Forgetting items not in boxes. Furniture, rugs, mirrors, and outdoor equipment often go undocumented. Add a “loose items” section to your master list and photograph each piece before loading.
A detailed inventory also gives carriers the information they need to provide accurate weight-based or volume-based pricing. That accuracy protects you from inflated estimates and moving-day surprises. Pair your inventory with a review of transparent pricing from licensed movers to understand exactly what you should be paying and why.
Key Takeaways
A complete, consistently updated moving inventory is the single most effective tool for controlling costs, protecting belongings, and resolving disputes during a long distance relocation.
| Point | Details |
|---|---|
| Start 8–12 weeks out | Early inventory creation reduces unplanned expenses and gives time to declutter before pricing. |
| Use 3–5 word descriptions plus photos | Brief descriptions with photos balance detail and efficiency without making the list unmanageable. |
| Document item conditions before packing | Pre-move condition photos are the foundation of any successful insurance damage claim. |
| Keep a digital backup and share it | Cloud-stored inventories survive moving day chaos and can be shared instantly with movers or family. |
| Cross-check at delivery before movers leave | Verify every box number against your master list before signing off on the delivery. |
The inventory habit that actually protects you
Most people treat the moving inventory as a formality. They build a rough list, lose track of it by week three, and then spend the first month in their new home wondering where things went. I have seen this pattern repeat across dozens of relocations, and the outcome is always the same: stress, disputed charges, and at least one item that simply cannot be accounted for.
The moves that go smoothly share one common trait. The person moving treated their inventory like a financial document, not a packing checklist. They updated it every time a box was sealed. They photographed contents before closing lids. They compared their list against the carrier’s inventory at delivery and flagged discrepancies on the spot.
What surprises most people is how much the inventory changes the dynamic with the moving company. When you show up with a numbered, photographed, cloud-backed list, carriers treat your shipment differently. It signals that you are organized, that you will notice missing items, and that you have the documentation to support a claim if something goes wrong. That signal alone tends to produce more careful handling.
The other underrated benefit is financial. A detailed inventory enables accurate pricing for weight-based or volume-based quotes. Carriers who can see exactly what they are moving give you a more accurate estimate. That accuracy is your protection against the moving-day price increase that catches so many people off guard.
Build the list early. Update it every time you seal a box. Keep it on your phone. That is the entire system.
— Info
How Movecraftmoving supports your long distance move
Planning a long distance relocation involves more than packing boxes. It requires coordinating timelines, managing documentation, and working with carriers who respect your belongings and your budget.

Movecraftmoving connects you with rigorously vetted carriers and relocation professionals who treat your inventory as seriously as you do. Every partner in the Movecraftmoving network operates with full transparency on pricing, so the number you see before loading day is the number you pay. For a full breakdown of what to expect at each stage, the long distance moving process guide covers timelines, documentation, and carrier coordination in detail. If you want professional packing support that works directly from your inventory, the packing service benefits guide explains exactly how that process works and what it costs.
FAQ
What should a moving inventory checklist include?
A moving inventory checklist should include a box number, a 3–5 word content description, a condition note, and a photo for each item or box. High-value items also need make, model, and serial number documentation.
How early should I start my moving inventory?
Start your inventory 8–12 weeks before your move date. Starting this early reduces the risk of unplanned expenses exceeding 20% of your total moving budget.
Do I need my own inventory if the movers create one?
Yes. Professional movers create a carrier inventory that serves their records. Your personal list is your independent verification tool for confirming delivery completeness and documenting damage for insurance claims.
What is the best format for a moving inventory?
A digital format stored in cloud-based tools like Google Sheets or a dedicated moving app is the most reliable option. Digital inventories allow photo attachments, easy sharing with movers, and instant access on moving day.
How do I use my inventory to file a damage claim?
Compare your pre-move condition photos against the item’s condition at delivery. Submit both sets of photos along with your inventory entry to your carrier or insurance provider as evidence that the damage occurred during transit.
Recommended
- Long Distance Moving Process Overview: 2026 Guide – Move Craft Moving Solutions LLC
- Long Distance Packing Service Benefits: Your 2026 Guide – Move Craft Moving Solutions LLC
- Commercial Move Vendor Coordination Checklist for 2026 – Move Craft Moving Solutions LLC
- Long Distance Moving Insurance Guide for Your Move – Move Craft Moving Solutions LLC